No edit summary |
No edit summary |
||
| (9 intermediate revisions by 4 users not shown) | |||
| Line 1: | Line 1: | ||
| + | {{Dungeon/header}} |
||
| − | |||
{{DungeonScheme|Limit=Team must all have five elements}} |
{{DungeonScheme|Limit=Team must all have five elements}} |
||
| − | This dungeon is the first of the |
+ | This dungeon is the first of the War Dragon series, as well as being the first conditional biweekly dungeon. This dungeon's condition is that your team must contain monsters with main type of all five elements. The dragon in this dungeon is named after the Sengoku-era warlord [http://en.wikipedia.org/wiki/Takeda_Shingen Takeda Shingen]. |
==Monster Data== |
==Monster Data== |
||
| Line 21: | Line 21: | ||
|leaderSkill={{技能评分|战国龙队长}} |
|leaderSkill={{技能评分|战国龙队长}} |
||
|overall=5 |
|overall=5 |
||
| − | |comments=High HP and ATK, decent RCV, plus a strong active skill makes the |
+ | |comments=High HP and ATK, decent RCV, plus a strong active skill makes the War Dragons outstanding Subs. They're fairly useless as leaders, with neither a remarkable multiplier nor condition. |
}} |
}} |
||
{{CharBox |
{{CharBox |
||
| Line 42: | Line 42: | ||
}} |
}} |
||
| ⚫ | |||
| − | {{Special}} |
||
| ⚫ | |||
| ⚫ | |||
| ⚫ | |||
| ⚫ | |||
| − | {{DungeonStat|sta=50|battle=7|gold=42187|gold2=47712|exp=18488|exp2=28159}} |
||
| − | {{DungeonHeader}} |
||
| − | {{DungeonMonster|063|turn=3|damage=13500|hp=61500|def=0|lv=10|note={{Energy Charge}} Next ATK→27000 {{texttipicon||Used when HP lower than 50%. 10% Chance}}}} |
||
| − | {{DungeonMonster|545|turn=1|damage=4331|hp=8133|def=2667|lv=7|note={{Ninja Trick Shadow Tagging}} Bind random 1 for 5 turns {{texttipicon||Guaranteed to use when HP lower than 25%. 1 time max}}}} |
||
| − | {{DungeonMonster|546|turn=1|damage=2745|hp=12|def=60000|lv=7|note={{Medicine of Strength}} 5 turns ATK→8235 {{texttipicon||Guaranteed to use when HP lower than 25%}}}} |
||
| − | {{DungeonMonster|551|turn=1|damage=4433|hp=8540|def=2667|lv=7|note={{Quick as Lightning}} Preemptive 2217}} |
||
| − | {{DungeonMonster|681|turn=1|damage=skill|hp=10|def=600000|lv=1|note={{Beckoning…}} Do nothing {{texttipicon||Use on 1st turn; at 100% chance; 1 time max}}<br>{{Cat Paw!}} 10800 }} |
||
| − | {{DungeonMonster|stage=1|fixed={{551|dungeonMonster}}×2 {{545|dungeonMonster}}×2 }} |
||
| − | {{DungeonMonster|416|stage=4|turn=1|damage=5653|hp=1029236|def=210|drop=gold|lv=10000|lv2=20000|note={{Water Prohibited}} Bind {{icon|gemWater}} 1–3 turns {{texttipicon||Use on 1st turn at 100% Chance}}<br>{{Giggling…}} Do nothing {{texttipicon||Use on 2nd turn at 100% Chance. 1 time max}}<br>{{Flaming Tail Attack}} Multi-hit 8480 {{texttipicon||Guaranteed to use when HP lower than 30%}}}} |
||
| − | {{DungeonMonster|stage=6|fixed={{551|dungeonMonster}}×2 {{681|dungeonMonster}} }} |
||
| − | {{DungeonMonster|540|stage=7|turn=2|damage=14010|hp=2033400|def=1120|lv=10|note={{Quiet as Woods}} Status effect null {{texttipicon||Use on 1st turn at 100% Chance}}<br>{{Stay as Mountain}} Next ATK→28020 {{texttipicon||Guaranteed to use when HP lower than 30%. 1 time max}}<br>{{Attack as Wildfire}} Multi-hit 21015. Stay as Mountain→42030 {{texttipicon||Used when HP lower than 60%. 50% Chance}}<br>{{icon|goldEgg}} 100% Drop}} |
||
| − | |} |
||
| − | {{Special}} |
||
| ⚫ | |||
| − | {{DungeonStat|sta=40|battle=7|gold=21097|gold2=28759|exp=10559|exp2=13086}} |
||
| − | {{DungeonHeader}} |
||
| − | {{DungeonMonster|063|turn=3|damage=9150|hp=41683|def=0|lv=7|note={{Energy Charge}} Next ATK→18300 {{texttipicon||Used when HP lower than 50%. 10% Chance}}}} |
||
| − | {{DungeonMonster|545|turn=1|damage=2958|hp=5556|def=2444|lv=5|note={{Ninja Trick Shadow Tagging}} Bind random 1 for 5 turns {{texttipicon||Gurantee to use when HP lower than 25%. 1 time max}}}} |
||
| − | {{DungeonMonster|546|turn=1|damage=1875|hp=10|def=60000|lv=5|note={{Medicine of Strength}} 5 turns ATK→5625 {{texttipicon||Guaranteed to use when HP lower than 25%}}}} |
||
| − | {{DungeonMonster|551|turn=1|damage=3028|hp=5833|def=2444|lv=5|note={{Quick as Lightning}} Preemptive 1514}} |
||
| − | {{DungeonMonster|681|turn=1|damage=skill|hp=5|def=600000|lv=1|note={{Beckoning…}} Do nothing {{texttipicon||Use on 1st turn; at 100% chance; 1 time max}}<br>{{Cat Paw!}} 5000 }} |
||
| − | {{DungeonMonster|stage=1|fixed={{551|dungeonMonster}} {{545|dungeonMonster}} }} |
||
| − | {{DungeonMonster|416|stage=4|turn=1|damage=3030|hp=551671|def=126|drop=gold|lv=5000|lv2=10000|note={{Water Prohibited}} Bind {{icon|gemWater}} 1–3 turns {{texttipicon||Use on 1st turn at 100% Chance}}<br>{{Giggling…}} Do nothing {{texttipicon||Use on 2nd turn at 100% Chance. 1 time max}}<br>{{Flaming Tail Attack}} Multi-hit 4545 {{texttipicon||Guaranteed to use when HP lower than 30%}}}} |
||
| − | {{DungeonMonster|stage=6|fixed={{551|dungeonMonster}}×2 {{681|dungeonMonster}} }} |
||
| − | {{DungeonMonster|540|stage=7|turn=2|damage=7991|hp=1159791|def=672|lv=6|note={{Quiet as Woods}} Status effect null {{texttipicon||Use on 1st turn at 100% Chance}}<br>{{Stay as Mountain}} Next ATK→15982 {{texttipicon||Guaranteed to use when HP lower than 30%. 1 time max}}<br>{{Attack as Wildfire}} Multi-hit 11985. Stay as Mountain→23973 {{texttipicon||Used when HP lower than 60%. 50% Chance}}<br>{{icon|goldEgg}} 40% Drop}} |
||
| − | |} |
||
| − | {{Special}} |
||
| − | |||
| ⚫ | |||
| − | {{DungeonStat|sta=25|battle=7|gold=7715|gold2=9611|exp=4024|exp2=5950}} |
||
| − | {{DungeonHeader}} |
||
| − | {{DungeonMonster|057|damage=2028|hp=7431|def=70|lv=5|note={{Heal Jammer}} }} |
||
| − | {{DungeonMonster|063|damage=3350|hp=15261|lv=3|note={{Energy Charge}} }} |
||
| − | {{DungeonMonster|545|damage=899|hp=1689|def=2111|lv=2}} |
||
| − | {{DungeonMonster|681|turn=1|damage=skill|hp=2|def=600000|drop=none|note=}} |
||
| − | {{DungeonMonster|089|stage=6|damage=5040|hp=144300|def=240|drop=088|lv=10|note=}} |
||
| − | {{DungeonMonster|088|stage=6|num=2|damage=810|hp=11700|def=80|lv=10|note=}} |
||
| − | {{DungeonMonster|540|stage=7|hp=286183|damage=1972|def=224|lv=2|note={{icon|goldEgg}} 5% Drop}} |
||
| − | |} |
||
| − | |||
| − | {{Special}} |
||
| − | |||
| ⚫ | |||
| − | {{DungeonStat|sta=15|battle=5|gold=2364|gold2=4240|exp=1361|exp2=2611}} |
||
| − | {{DungeonHeader}} |
||
| − | {{DungeonMonster|056|hp=1112|damage=462|def=18|lv=6}} |
||
| − | {{DungeonMonster|062|hp=5647|damage=1181|lv=6}} |
||
| − | {{DungeonMonster|545|damage=213|hp=400|def=2000|lv=1}} |
||
| − | {{DungeonMonster|681|turn=1|damage=skill|hp=1|def=600000|lv=1|note=}} |
||
| − | {{DungeonMonster|stage=5|540|hp=67780|def=112|damage=467|lv=1|note={{icon|goldEgg}} 2% Drop}} |
||
| − | |} |
||
| − | |||
| − | ==Sample Teams== |
||
| − | Below are sample teams that have successfully conquered this dungeon. You are welcome to share your own teams and tips here. |
||
| − | |||
| − | {{Note|color=red|50% Fire resist monsters<br>{{182}} {{293}} {{290}} {{122}} {{123}} {{389}} {{388}} {{211}} {{408}}}} |
||
| − | |||
| − | {{note|Legend}} |
||
| − | {{SampleTeamList|stone=no}} |
||
| − | {{SampleTeam|ver=5.1.1|389|239|241|394|397|388|hp=7500+|note=Grind. Minerva should ideally have max skill (kill off mobs, finish faster). {{397}} can be replaced by {{190}}, other teammates can be whatever with high RCV. Sweep and charge skills, it's just a matter of time. Recommend average level 60+.../[http://zh.pad.wikia.com/wiki/User:%E3%83%9F%E3%83%84%E3%83%AB ミツル] }} |
||
| − | {{SampleTeam|ver=5.1.1|388|392|188|597|190|388|hp=11600|note={{654}}, {{625}}, {{514}}, {{315}} can replace {{392}}. Charge skills when only {{546}} or {{681}} are left. Recommend using only 2 Gravities on 4F, just watch your HP on 5F and it'll be easy if you don't slip up}} |
||
| − | {{SampleTeam|ver=5.1.1|293|629|397|393|139|388|hp=10241|note=RCV 2200+}} |
||
| − | {{SampleTeam|ver=5.1.1|491|317|321|319|318|491|hp=16000+|note=sweep}} |
||
| − | {{SampleTeam|ver=5.1.1|566|190|224|574|596|566|hp=14500+|note=25x sweep}} |
||
| − | {{SampleTeam|ver=5.1.1|211|137|321|321|202|139|hp=13872|note=Most important is to get big combos on 1F and kill everything in 3 turns. Susano max level, Siren max skill, Amaterasu 4100 heal. The return of Amaterasu Era}} |
||
| − | {{SampleTeam|ver=5.1.1|188|190|135|201|137|491|hp=13155|note=Echidna not skilled up; Susano max skill; average level 60}} |
||
| − | |} |
||
| − | |||
| − | {{note|Master}} |
||
| − | {{SampleTeamList|stone=no}} |
||
| − | {{SampleTeam|ver=5.1.1|204|321|445|026|248|211|hp=9100+|note=Didn't use Rainbow Keeper's skill at all, he's just there for extra HP and RCV. Archangel heals 1800+, all team average level 30. Boss took around 150 rounds to grind out. Meteor Volcano Dragon & Caol-ila were main damage dealers, very safe if you charge Caol-ila's skill before every floor. Keep 3 Hearts on the board every round against the boss, use Rainbow/Archangel's skills to save you if necessary}} |
||
| − | {{SampleTeam|ver=5.1.1|389|363|135|141|319|491|hp=14000+|note={{389}} can swap for {{388}}, super no-pressure. Faster if {{389}} is max skill. If lacking hearts, use Orochi. Activate Orochi as soon as boss battle begins, average 20-30 mins to finish}} |
||
| − | {{SampleTeam|ver=5.1.1|139|321|283|203|190|293|hp=12577|note=}} |
||
| − | {{SampleTeam|ver=5.1.1|293|515|241|190|201|388|hp=10000+|note=Average level 50, having max-skill {{388}} lets you play in your sleep}} |
||
| − | {{SampleTeam|ver=5.1.1|493|515|241|190|201|493|hp=11000+|note=Average level 50, key is charging up {{190}}{{201}} skills before the boss. If you don't fumble, you'll sweep him, else he'll sweep you}} |
||
| − | {{SampleTeam|ver=5.1.1|493|513|363|190|201|188|hp=11000+|note=A 9x attack team can easily pass, average levels around 40. Tough part is 4F, make sure you keep 3 or more Hearts on the board, recommend max-skill Isis. Don't run right in, charge up your skills whenever you see a Mid Ninja. Boss battle: Echidna -> 2 Gravities -> If full HP, sweep/If not full HP, fill up HP then sweep. You can finish in 2 rounds with 5-7 combos.}} |
||
| − | {{SampleTeam|ver=5.1.1|211|442|241|444|190|139|hp=10000+|note=This team is super stable and fairly fast. |
||
| − | Average around level 30, the key is {{139}} is max level +297. Take care to kill Light enemies on first floor, afterwards just make matches until Whiskey Dragon is ready. It'd be perfection if you swap {{211}} for {{388}}. Swapping {{444}} with {{597}} or {{442}} can speed you up |
||
| − | Note: Swapping {{211}} with {{388}} might hit your team cost ceiling so swap {{241}} for any low-cost Wood type (The whole team needs ~190 cost)}} |
||
| − | {{SampleTeam|ver=5.1.1|290|391|016|393|321|290|hp=12116|note=RCV 1696... Basically neer lacked hearts at the boss... Flare Drall turns Wood into Hearts... Totally full after a combo... The only thing is that I had to use {{393}}'s skill to heal once against the kitty and Light ninja... You'll never die =]}} |
||
| − | {{SampleTeam|ver=5.1.1|388|391|393|226|484|139|hp=11319|note={{139}}Max lv+81}} |
||
| − | {{SampleTeam|ver=5.1.1|293|321|201|362|226|139|hp=10173|note=No skill ups at all, Amaterasu heals 2275, no pressure, but took 200 rounds to kill the boss}} |
||
| − | {{SampleTeam|ver=5.1.1|211|212|213|214|397|139|hp=9405+|note=Dark/Dark Hades can be swapped for Hera. Amaterasu heals 3124 each round. Focus on killing Light ninjas on 1F, leave Fire ninjas/ogres for charging skills as much as possible to the next floor. Use skills on 4F, then charge them towards the end. If in danger on any floor, use Resist Dragon's blast, then charge it up again. |
||
| − | }} |
||
| − | {{SampleTeam|ver=5.1.1|491|201|560|214|321|493|hp=11000+|note=Wood type can swap for other high-HP Wood monsters. The important part is Echidna, she must have her skill ready before the boss battle, and use it as soon as the boss appears. If your luck is good, use 12x attacks for 5 rounds to kill him. If he's still not dead in 5 rounds, use Rainbow Keeper's half-damage skill and kill him in 7-9 rounds, or you'll have to use a stone.}} |
||
| − | {{SampleTeam|ver=5.1.1|493|201|231|188|190|491|hp=10000+|note=A 12x attack team can win easily. Whole team average lv 30s, tough part is stage 4. If you can't sweep through quickly with 12x, then charge up skills slowly with 3x, and use Echidna if you're lacking Hearts. Use skills when the boss appears, if you're successful he'll go to heaven before he can make a move.}} |
||
| − | |} |
||
{{Biweekly Dungeon}} |
{{Biweekly Dungeon}} |
||
Latest revision as of 05:57, 11 July 2014
| Dungeon Data | Sample Teams |
|---|
Characteristics
Team must all have five elements
| |||
This dungeon is the first of the War Dragon series, as well as being the first conditional biweekly dungeon. This dungeon's condition is that your team must contain monsters with main type of all five elements. The dragon in this dungeon is named after the Sengoku-era warlord Takeda Shingen.
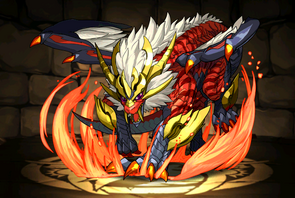
Monster Data
No. 540
Fire Samurai Dragon, Shingen
Skill
L. Skill
HP
Attack
Recover
Overall
High HP and ATK, decent RCV, plus a strong active skill makes the War Dragons outstanding Subs. They're fairly useless as leaders, with neither a remarkable multiplier nor condition.
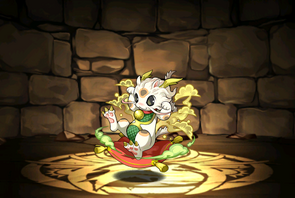
No. 681
Manekimewdra
Skill
L. Skill
HP
Attack
Recover
Overall
Fuse for 20000 EXP, 30000 for same color. Try and stock up.
Wind, Forest, Fr & Mt.-Legend
| 50 | 42187-54881 (971/Sta) | ||
| 7 | 18488-28159 (466/Sta) |
| |||||||||||||||||||
|---|---|---|---|---|---|---|---|---|---|---|---|---|---|---|---|---|---|---|---|
| 13500 | 3 | 61500 | 0 |
| |||||||||||||||
| 4331 | 1 | 8133 | 2667 |
| |||||||||||||||
| 2745 | 1 | 12 | 60000 |
| |||||||||||||||
| 4433 | 1 | 8540 | 2667 |
| |||||||||||||||
| Skill | 1 | 10 | 600000 |
| |||||||||||||||
| 8430 | 3 | 38550 | 0 |
| |||||||||||||||
| Invade | Skill | 1 | 647400 | 4800 |
| ||||||||||||||
| 1 | Fixed Enemies: | ||||||||||||||||||
| 4 | 5653 | 1 | 1029236 | 210 |
| ||||||||||||||
| 6 | Fixed Enemies: | ||||||||||||||||||
| 7 | 14010 | 2 | 2033400 | 1120 |
| ||||||||||||||
Wind, Forest, Fr & Mt.-Master
| 40 | 30977 (774/Sta) | ||
| 7 | 14564 (364/Sta) |
| |||||||||||||||||||
|---|---|---|---|---|---|---|---|---|---|---|---|---|---|---|---|---|---|---|---|
| 9150 | 3 | 41683 | 0 |
| |||||||||||||||
| 2958 | 1 | 5556 | 2444 |
| |||||||||||||||
| 1875 | 1 | 10 | 60000 |
| |||||||||||||||
| 3028 | 1 | 5833 | 2444 |
| |||||||||||||||
| Skill | 1 | 5 | 600000 |
| |||||||||||||||
| 3903 | 3 | 17847 | 0 |
| |||||||||||||||
| Invade | Skill | 1 | 438793 | 3360 |
| ||||||||||||||
| 1 | Fixed Enemies: | ||||||||||||||||||
| 4 | 3030 | 1 | 551671 | 126 |
| ||||||||||||||
| 6 | Fixed Enemies: | ||||||||||||||||||
| 7 | 7991 | 2 | 1159791 | 672 |
| ||||||||||||||
Wind, Forest, Fr & Mt.-Expert
| 25 | 7715-9611 (347/Sta) | ||
| 7 | 4024-5950 (199/Sta) |
| ||||||||||
|---|---|---|---|---|---|---|---|---|---|---|
| 2028 | 3 | 7431 | 70 |
| ||||||
| 3350 | 3 | 15261 | 0 |
| ||||||
| 899 | 1 | 1689 | 2111 | |||||||
| 152 | 1 | 2 | 600000 |
| ||||||
| 1186 | 3 | 5426 | 0 | |||||||
| Invade | 768 | 1 | 91116 | 960 | ||||||
| 6 | 5040 | 2 | 144300 | 240 | ||||||
| 810 | 2 | 11700 | 80 | |||||||
| 7 | 1972 | 2 | 286182 | 224 |
Wind, Forest, Fr & Mt.-Int
| 15 | 2364-4240 (220/Sta) | ||
| 5 | 1361-2611 (132/Sta) |
| |||||||||
|---|---|---|---|---|---|---|---|---|---|
| 462 | 4 | 1112 | 18 | ||||||
| 1181 | 5 | 5647 | 0 | ||||||
| 213 | 1 | 400 | 2000 | ||||||
| 36 | 1 | 1 | 600000 |
| |||||
| 281 | 3 | 1285 | 0 | ||||||
| Invade | 182 | 1 | 21580 | 480 | |||||
| 7 | 467 | 2 | 67780 | 112 |
Biweekly Dungeon
Insect Dragon
![]()
![]()
![]()
![]()
![]()
Dragon Princess
![]()
![]()
![]()
![]()
![]()
Flower Dragons
![]()
![]()
![]()
![]()
![]()
Pirate Dragons
![]()
![]()
![]()
![]()
![]()
Artifact Dragons
![]()
![]()
![]()
![]()
![]()
Samurai Dragons
![]()
![]()
![]()
![]()
![]()
Ancient Dragons
![]()
![]()
![]()
![]()
![]()
Mechdragons
![]()
![]()
![]()
![]()
![]()
Sky Dragons
![]()
![]()
![]()
![]()
![]()
Legendary Dragons
![]()
![]()
![]()
![]()
![]()
Twitter Survey
![]()
![]()
![]()
![]()
![]()
![]()
![]()
![]()
![]()
![]()
![]()
![]()
![]()
Others